Umbrella Rotor
I'll have some details about the construction in the future.
Click on the thumbnail images to get the larger versions to open in a new browser window.
 |
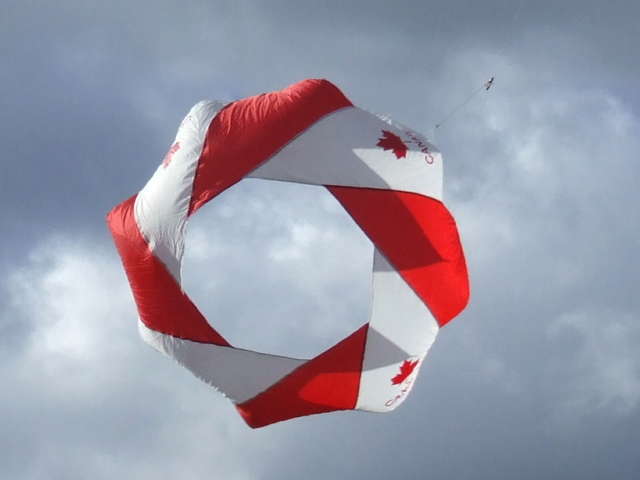
I could not resist buying the broken umbrella at the Salvation Army Thrift Shop. The price was something like 99 cents. The ribs were coming apart at the middle, but the fabric had no holes and was relatively clean and bright. I used a seam ripper to separate the panels, hemmed them, and then sewed them back together but with the sides offset by 18 cm. The long sides of the "teeth" are 36 cm. That difference in the lengths is what makes it spin. |
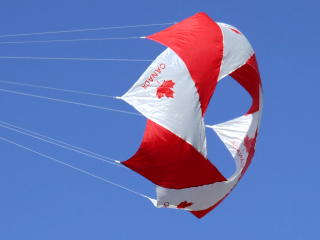
View from downwind, at the back of the rotor. |
|
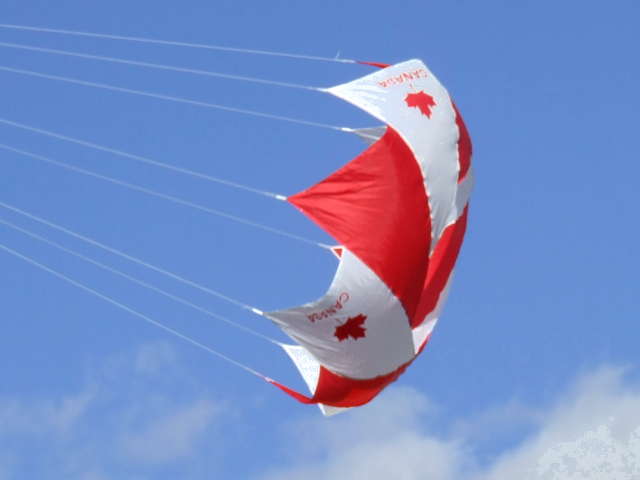
The bridle lines are 8 feet long, meeting at the swivel. In this view, the top of the rotor is moving toward you. When viewed from the flying line anchor (left of this photo), it is spinning clockwise. |
|
 |
|
Video: Part 1 First test "flight", at the soccer field on Lorne Street. The lifter kite is a standard Dunton-Taylor Box Delta, which is a bit small for this job. That's probably why I had to keep chasing it all over the place with the lens. I just wanted it in the air while I was setting up the FF04A Flowform. |
|
Video: Part 2 Later that day. I had moved the rotor to the FF04A and the wind settled down a bit. Notice that it tends to sag more than a typical rotor made from ripstop nylon, which is somewhat lighter than this umbrella fabric. Even so, it did a pretty good job of staying inflated and spinning. |
.