FF04A Flowform With Tapered Tube Tails
The plan I used for this one was developed by Harald Prinzler. It certainly helped to have the spreadsheet to be able to scale it. I used a multiplier of 2.5, and was able to read the calculated values directly in centimeters. (Harald suggests a length of 2 meters as a minimum size, which would require a multiplier of 2.)
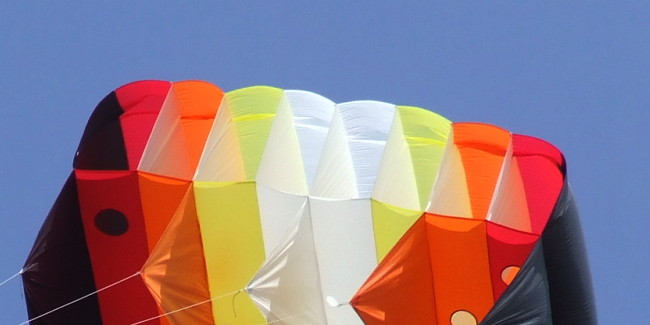
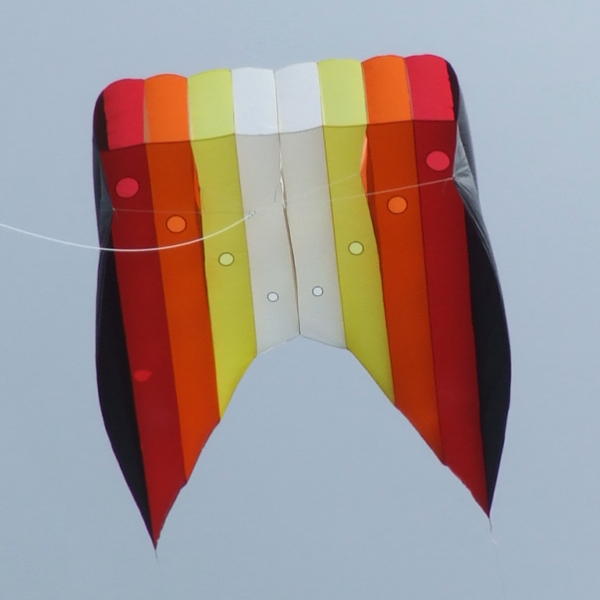
So, I had settled on a 2.5 meter baseline, which is the length of the bottoms of the longest profiles (the vertical dividers between the cells). In my case, those are the outer black side panels. This then results in a width of 2 meters. The area of the bottom face works out to something like 3.5 square meters (38 square feet). A decent size, and still easy to manage by myself.
When I was deciding on the colours, I used POV-Ray to render some images, and this was what I decided on:
 - At first I had black where the red is now, then orange and yellow, but it just looked too heavy, visually. With the white in the middle, it sort of looks "hotter", and the remaining black adds drama.
It was easy to use cone primitives to add on some tapered tube tails:

The first runner-up for a colour scheme:
 ... but I wanted the warmer colours. I did, however, end up using that colour scheme for my Sceptre Mk2 foil.
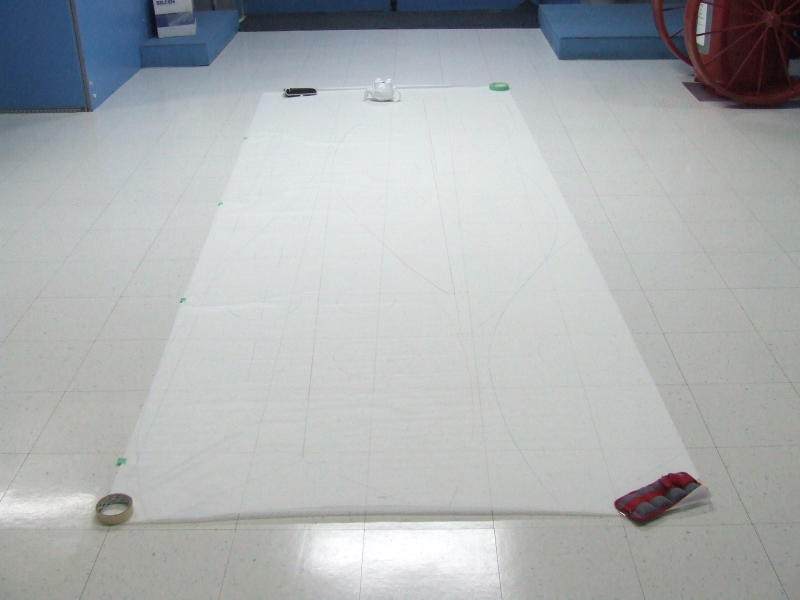
Templates were drawn and cut out, so construction begins. Here's the white that I used for the profiles. (The lines are very faint.) Fortunately, I was able to do some of it at my workplace after hours, where there is lots of open floor space covered with a handy grid of 1-foot tiles.
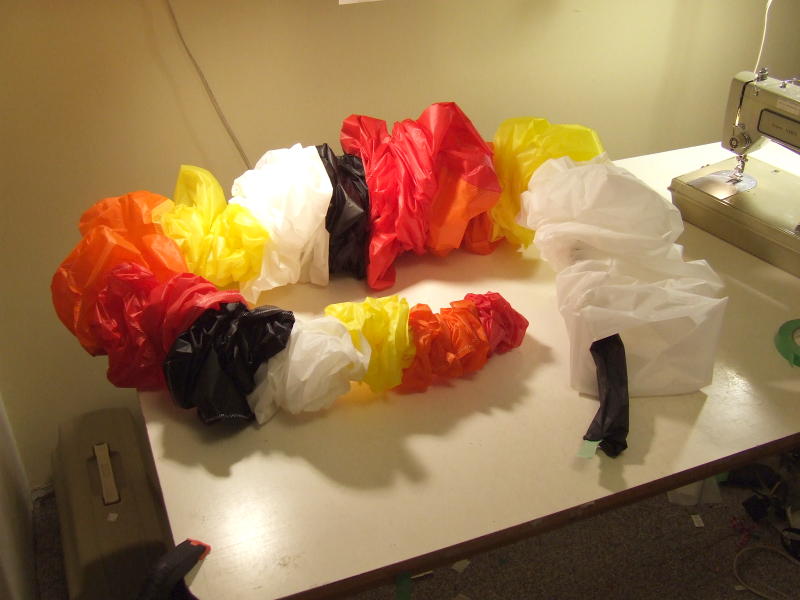
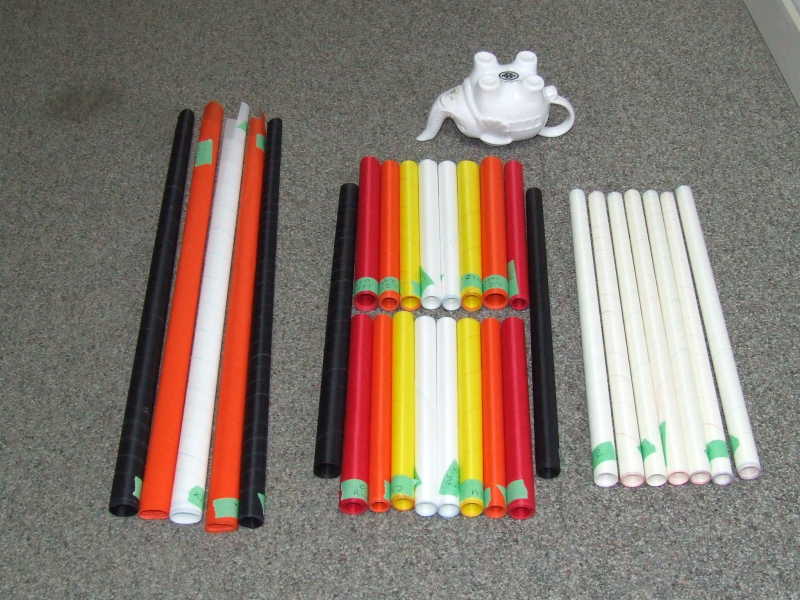 Thirty pieces of 0.75 oz. coated ripstop nylon, ready to sew.
Time passes.
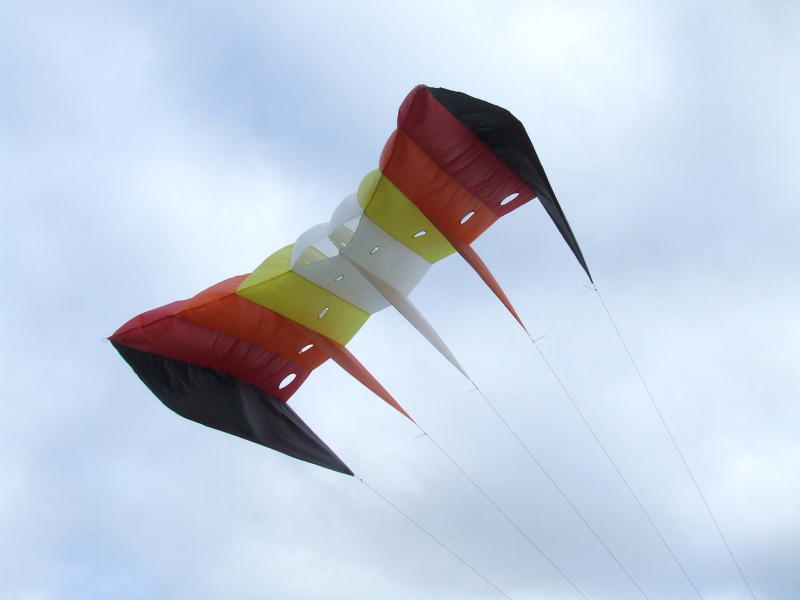
July 23, 2009 - It's all sewed together. I tried it out on 30 feet of rope in the back yard, which had much turbulence and wind shear around the house and nearby trees. Even so, it inflated and went up. Woo-hoo!
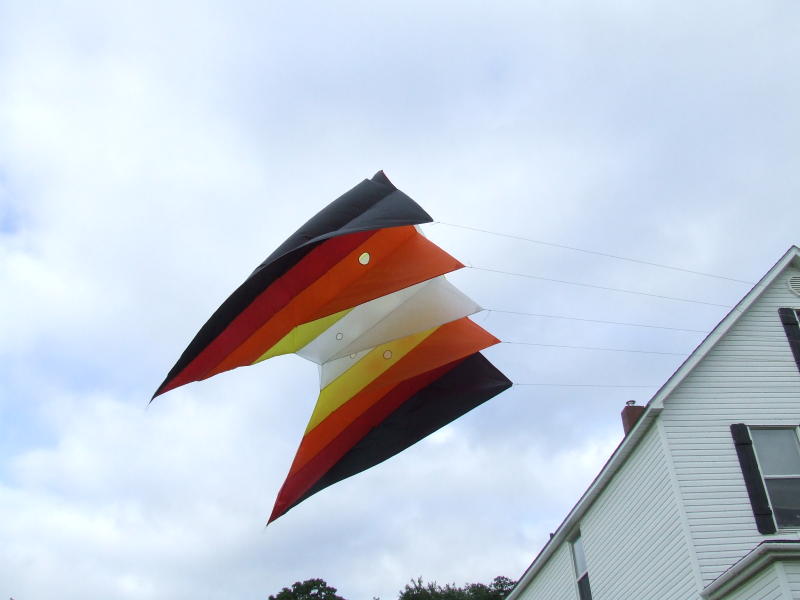
The next day a friend came over with one of his pre-school kids. I showed the pictures of the kite to the kid, and he said it looked "scary". Well, I guess it does have those big fangs hanging down. That would be the dramatic effect was hoping for, I guess.
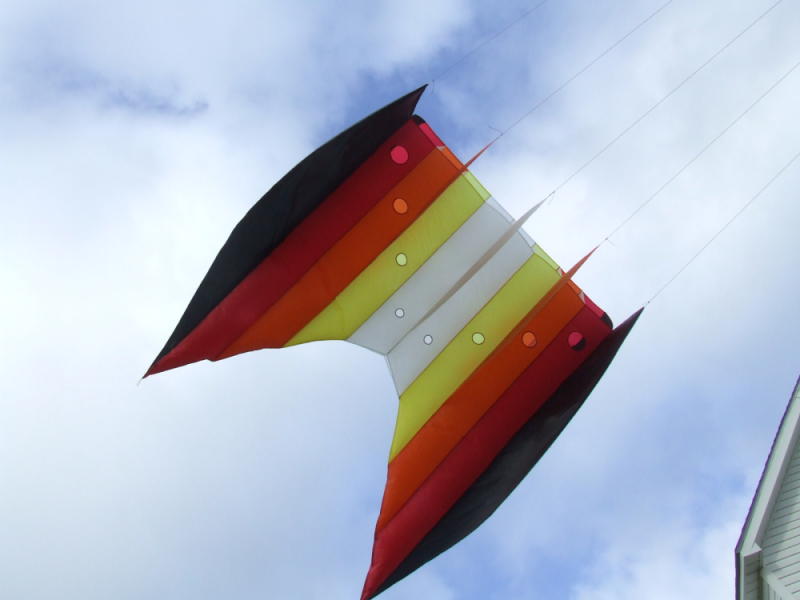
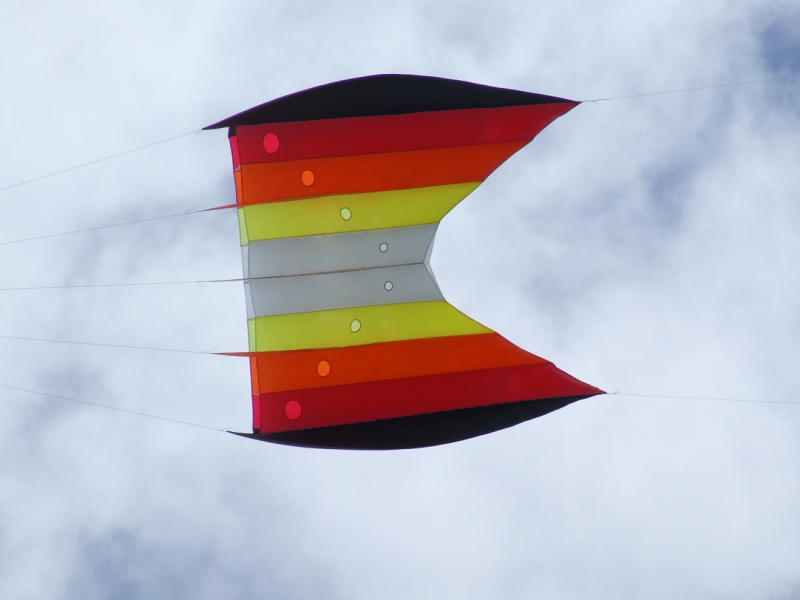
A few days later, I tried it out at nearby Fort Beausejour, on 75 yards of 450 pound test braided Dacron flying line. Maybe I'll put up more photos of that session later, but in the meantime the most interesting thing of note was that the upper leading edges usually had this crease.
 - Detail of the leading edge, showing the creases.
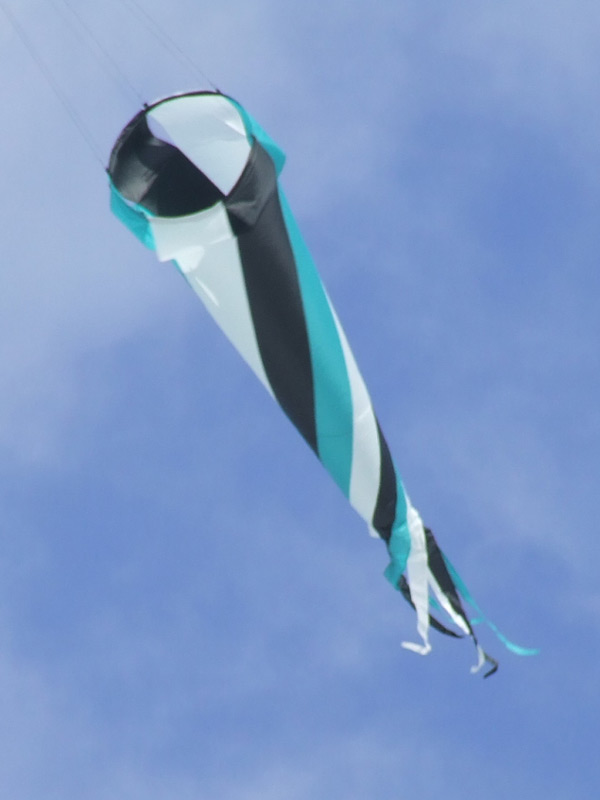
It may be due in part to the tails I was using (or not using). First I tried it with a small windsock, about 5" wide, and 5' long, on a "Y" bridle. Then I switched to a 10 foot spinsock on the Y bridle. I also tried it with no tails. In most cases, unless the wind was perfect, it tended to drift from side to side, sometimes going right to the edge of the window and landing on the ground. Also see the videos about the trailing edges (below).
These each have 15 sections of fabric, each section cut from the full width of a roll of ripstop, which is nominally 60" wide. So, that would be 15 times 60", or 75 feet. With variations in the roll widths (5 different colours) and seam allowances, the actual finished lengths are only 74' 9". Close enough. The leading end opening is 8" diameter, and it tapers down to 2" diameter. Since each of the 15 pieces were a different size trapezoid, I came up with a spreadsheet to help me calculate the dimensions. It's a coincidence that the pair of tails required 30 pieces of ripstop nylon, as did the kite itself.
 30 Pieces of RSN for the tails, rolled up. That's an 18" ruler for reference. (400 x 200 version)
 Here's one of the tails ready to pull right side out. The thin black end has been pulled through inside all of the other pieces, and is visible in the lower right. Once I pull it out, the seam allowance will end up on the inside. (400 x 300 version)
For the leading edges of the tails, I sewed a 1.5" wide band of 3.9 oz. white dacron around the inside. Then I hot-cut four 4.5" lengths (8 in total for the pair of tails) from a white boot lace, and sewed them on as the tail bridle tabs. I figured that boot laces were designed to take a lot of abrasion, flexing and tension, yet they are flat and soft enough to sew through easily. The bridle legs were two 6-foot lengths of 100# braided dacron, doubled for four 3' legs. those were gathered together by a short loop of line, but not actually tied at the front of the bridle. I used a fishing swivel between the loop and the connector line (2 meters? I forget exactly) going to the kite's tail tabs, just to make sure that the connector line doesn't get twisted up.
August 8, 2009
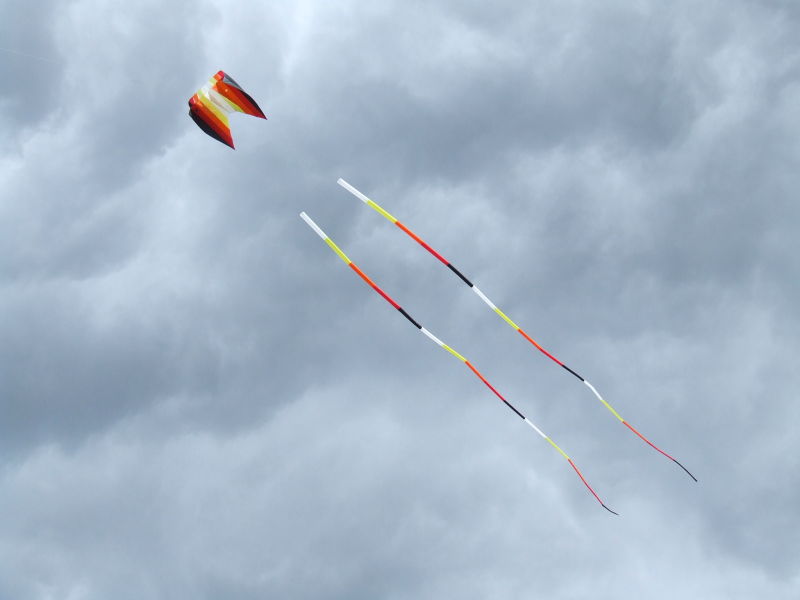
A perfect day. I didn't have to go to work, it was partly cloudy, not too warm, winds NW 15-20 kph, my neighbour had mostly finished mowing, raking , bailing and collecting the hay on his field the day before, and I finally got the tails finished the night before. A convergence of all the necessary elements.
Off I went (a two-minute walk), and got everything set up for a long launch. I spooled out 85 yards this time, since I had to anchor at the bottom of the far side of the hill.
 T minus 30 seconds - Launch delay!
Just before I was about to launch, my neighbour fires up the tractor to do some raking on the last bit of hay, remaining in one end of the field. He said, "Oh, I'll just be 10 minutes or so." This gave me some time to double-check the anchor and whatnot.
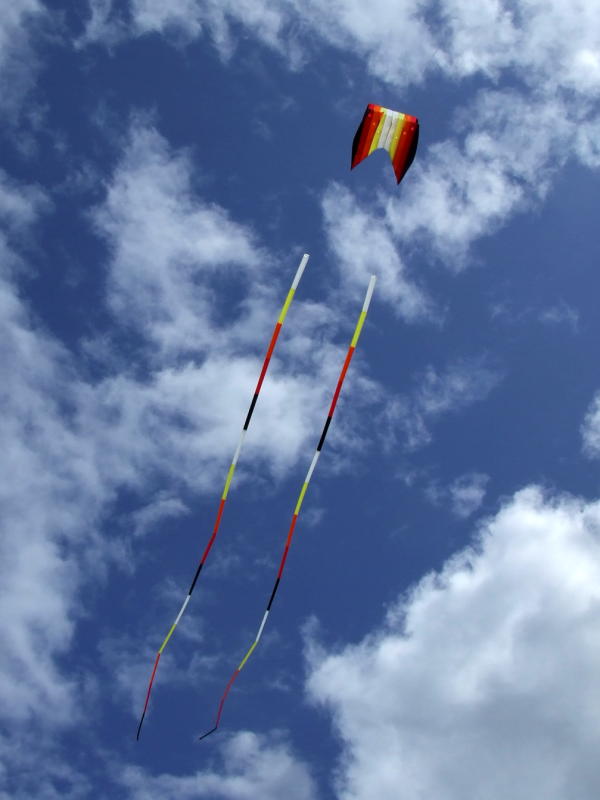
Right about then, Sue (my wife) walked up, just in time to help launch it. Which we did. She was impressed. So was I. It was awesome, once the tails stretched out and inflated fully.
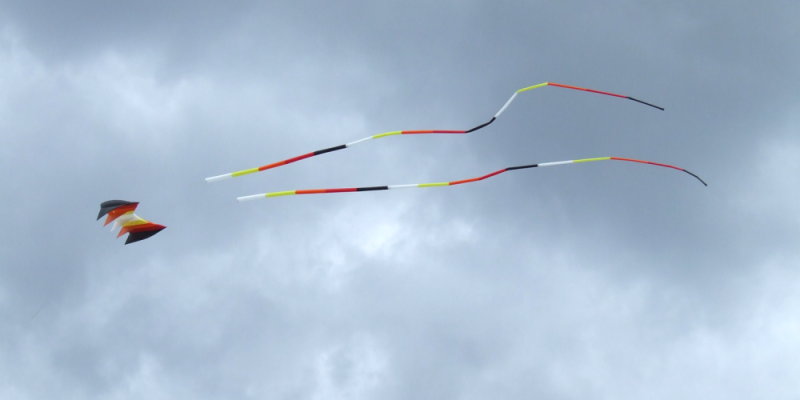
Later I let out more line, for a total of 121 yards (111 m) or so.
 -
-  -
-  -
-
At one point, a young couple with two little kids stopped their minivan on the road to watch nearby, and we chatted for a bit. She said they spotted it from Cattail Ridge. (I must look up what that distance would be. A few kilometers, at least.)
Some "mug shots":
 See? No creases, all day. I'm not sure if this was because of the tails providing just the right drag, which changes the angle of attack, or if it was because when Sue helped me launch it, we made sure it was fully inflated and had no creases.
 - directly underneath. The "seamy underbelly", so to speak.
Then I had another visitor.
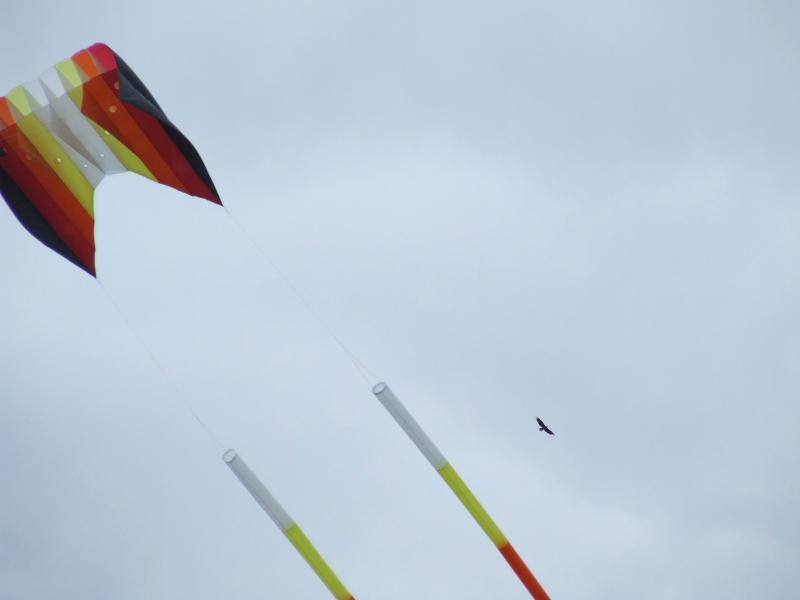 I thought it was an eagle, but wasn't sure.
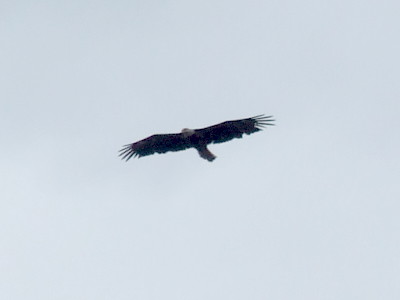 This is from another zoomed-in shot of the same bird. With a bit of image enhancing, I could plainly see the distinctive white head of a bald eagle.
http://www.youtube.com/watch?v=FR-12t4HyNI
http://www.youtube.com/watch?v=OcBer3X44x4
This one shows the activity at the trailing edge and outer keels, without the tube tails (taken previously, at Fort Beausejour):
http://www.youtube.com/watch?v=Td03iGHLJfQ
With the tails (not so much bouncing up and down):
http://www.youtube.com/watch?v=O1vv-ujr-bg