 .
. 
Mini-Mock Kite
.
Background
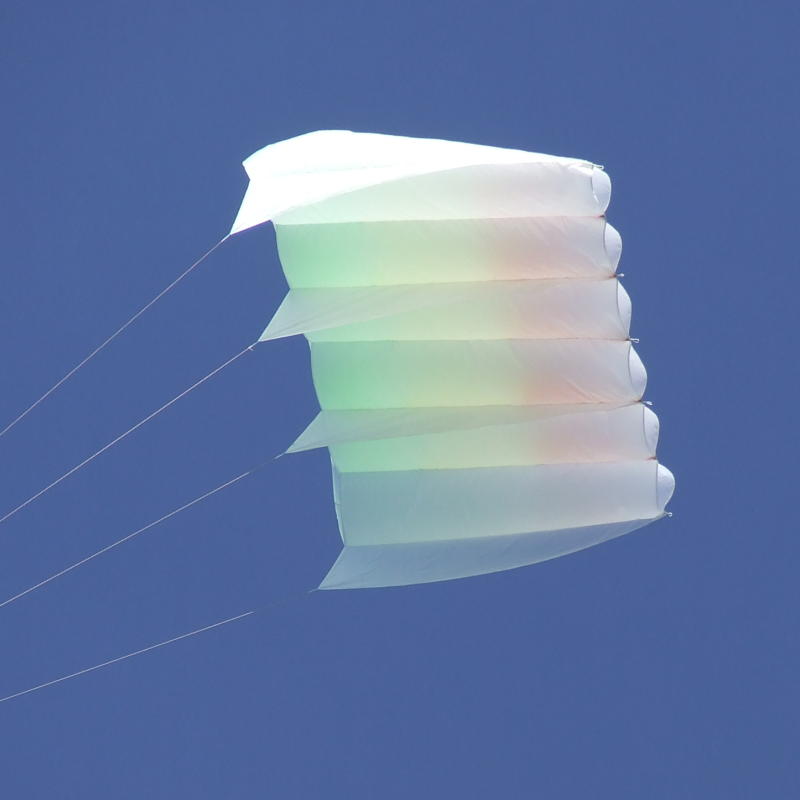
This is a reduced version of Don Mock's "Mock-Form" kite. The full-sized version has 8 cells, with 14 inch spacing between the ribs, rib length of 80 inches, and is 62 1/2 square feet in area. The Mini Mock has only 6 cells, 10" rib spacing, 48" rib length, and has a nominal area of 20 square feet. Apparently it was developed as a lifter for KAP (Kite Aerial Photography) equipment.
You can get the plans for it at the Kite Plan Base: Mini-Mock by Don Mock. It's all in German, but the dimensions are the important part. The German version of the plans and the original English workshop assembly notes, "Original-Bauplan (englisch)" without drawings, are here - Schmidts-Pit's neue Drachenseite. One caveat about the workshop notes: allow much more extra length when cutting out the upper panels ("cell backs"). Don suggested 54" plus a bit extra to trim. It should be at least 57" plus extra, so I just used the full 60" width of the fabric roll.
Here are some kitebuilder.com forum threads discussing this design:
mini mock build - It contains some useful info about the bridle lengths, which are not mentioned in any detail in the plans.
Mini Mock Foil (it's actually more of a hybrid of a flowform and a parafoil) - has links some full-sized template drawings. It also has some discussion about how to finish the trailing edges (open, sewn shut, or some of each).
Patrick Mann relates this business about the trailing edge:
Interestingly, Don gave us a choice between closing most of the cells in the back or leaving them all open. The former results in a slightly lower angle of flight and increased pull, a good choice for a lifter kite. The latter yields a kite that flys at a very high angle and does not pull very hard.
http://www.oocities.com/soho/1911/minimock/mock.htm
July 19, 2010, 8:00 A.M - I finished it, with all cells open at the trailing edge (for now). Yay, it flies, in spite of very low wind and wetness from the dew which makes it heavier.
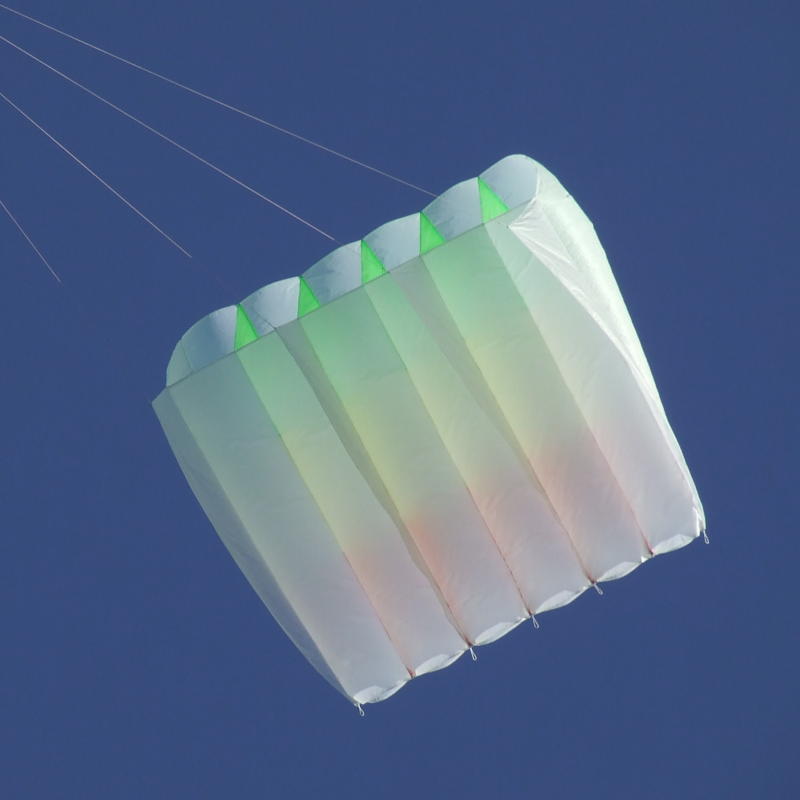
The transition from green to yellow looks pretty good, but the yellow to orange seem rather abrubt. Perhaps this is partly due to how thin the orange section is.
We have video...
... with a fuzzy tail.
Coming soon: the matching tails and a bag.
Some construction details
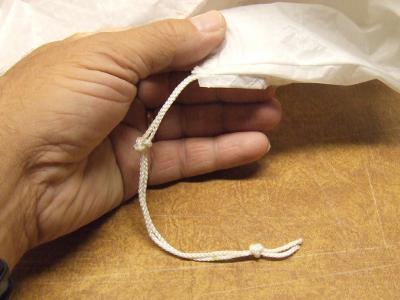
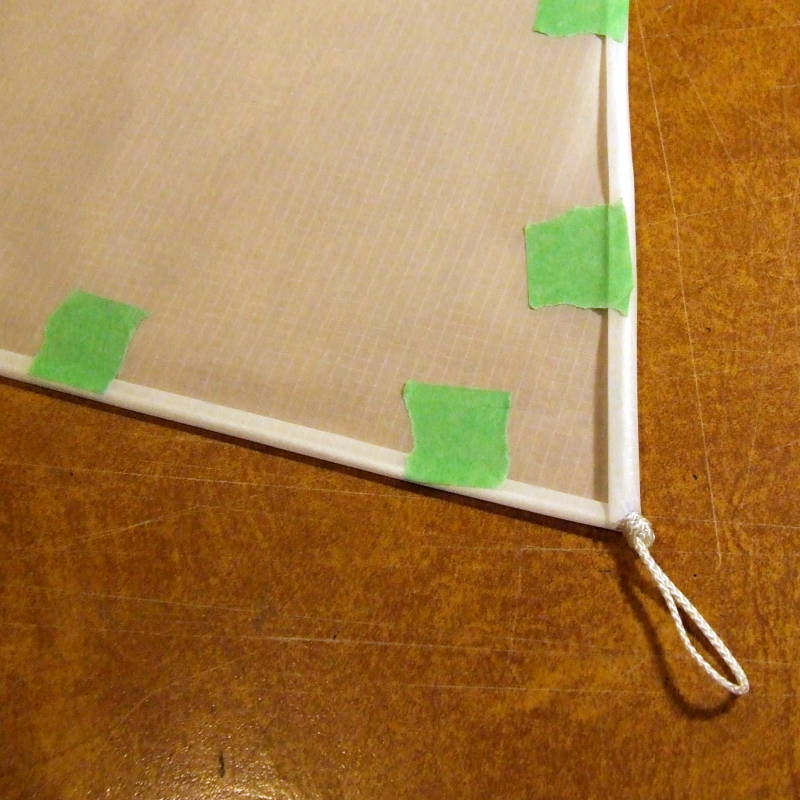 This is how I did the bridle tabs on the keels. (same image: medium size) I tited the knot first, and then was able to push the line into the creased keel hems. This is when I should have included the triangular Dacron reinforcement patches that I meant to use. As it turns out, I guess I didn't need them. Also see the next photo.
 Finished keel bridle tab. (same image: medium size) The purpose of the knot is to prevent the line from tearing through the hem when under stress.
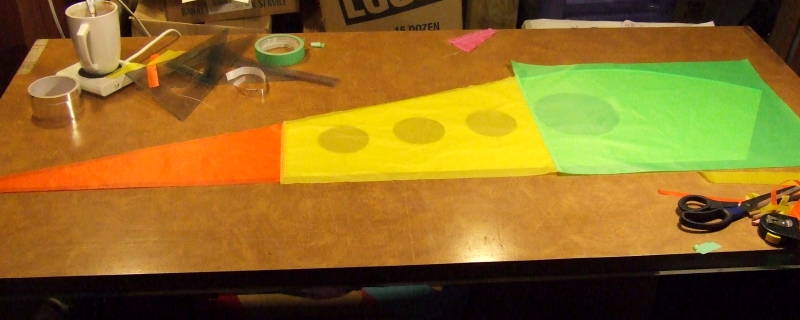 A roughed-out profile panel laying on top of the profile template.
 A little detail to remember when lining up the profile to the bottom panels. You don't line up the corners of the cut pieces, because of the hem allowance.
Flight Photos
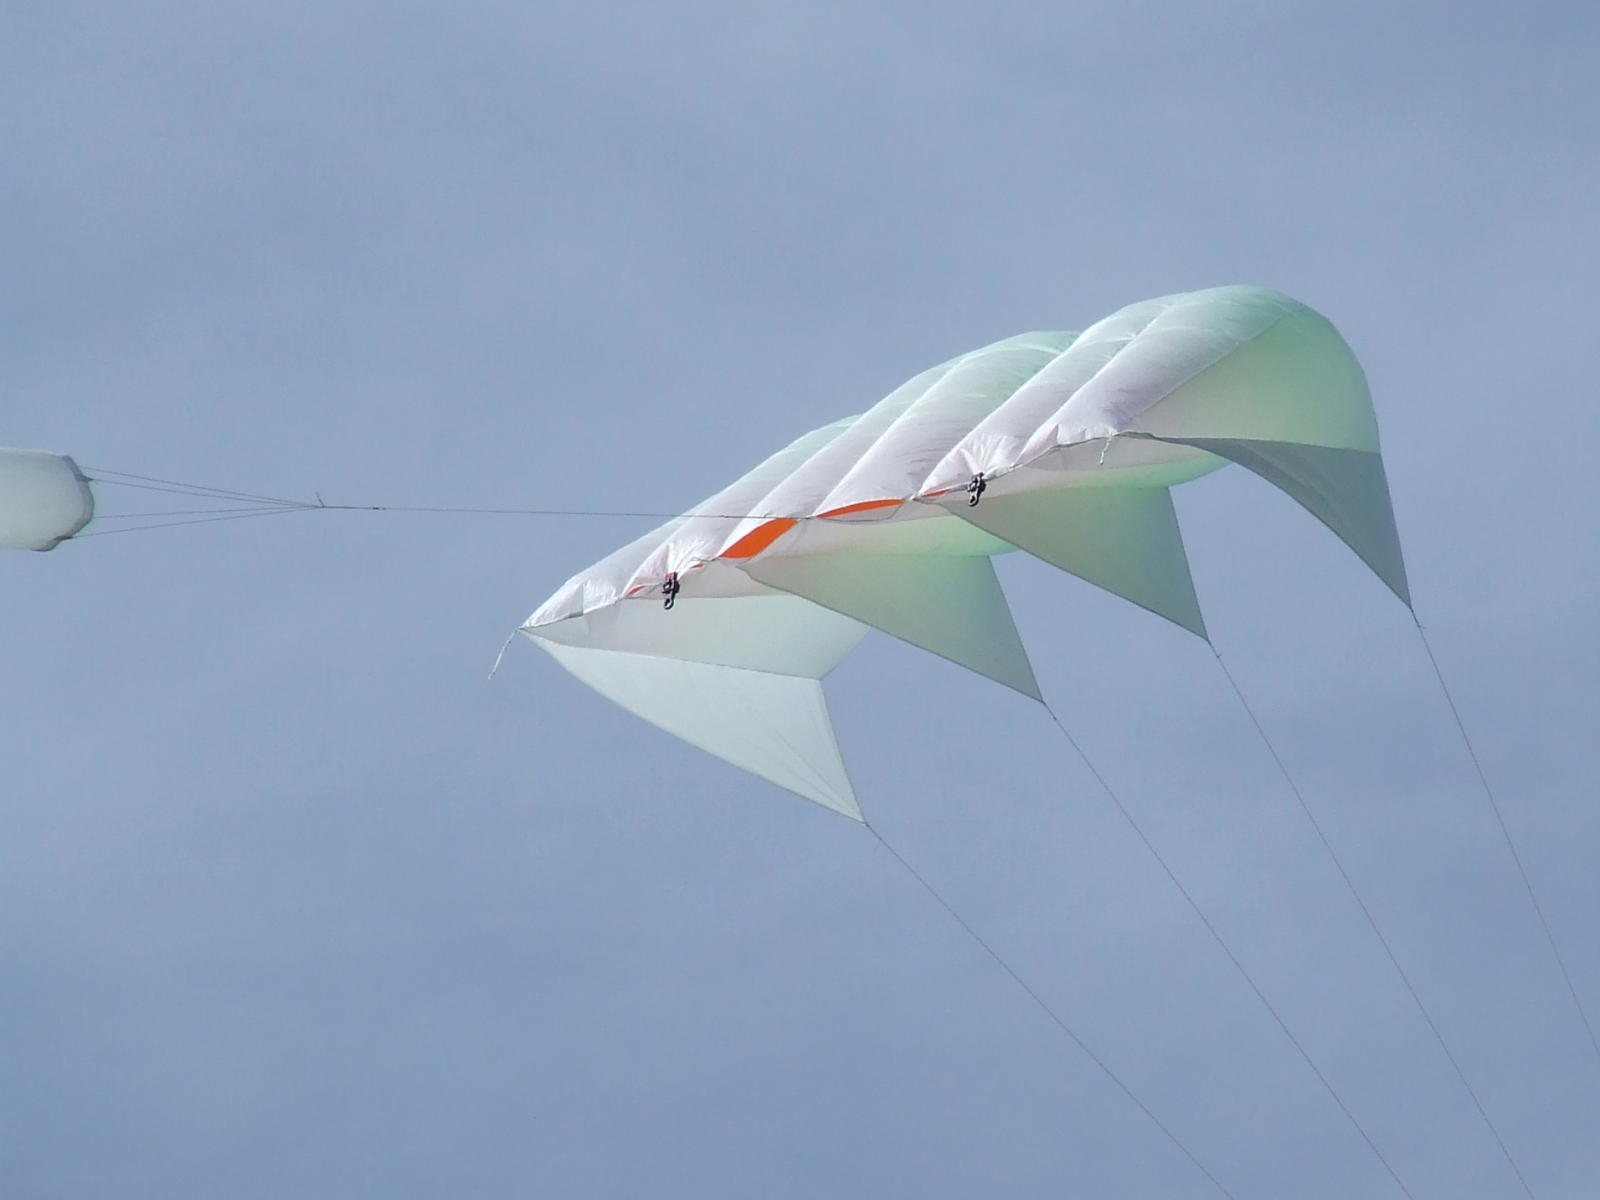 Using plastic tarp clips (on cells # 2 and 4) to experment with partially closing some of the cells' rear openings. (same image in medium size) At this time I had sewn shut the two outer cells. Later I opened them up and installed Velcro tabs on all cells so that I could choose which ones to close partially. (detailed photos of those further down).
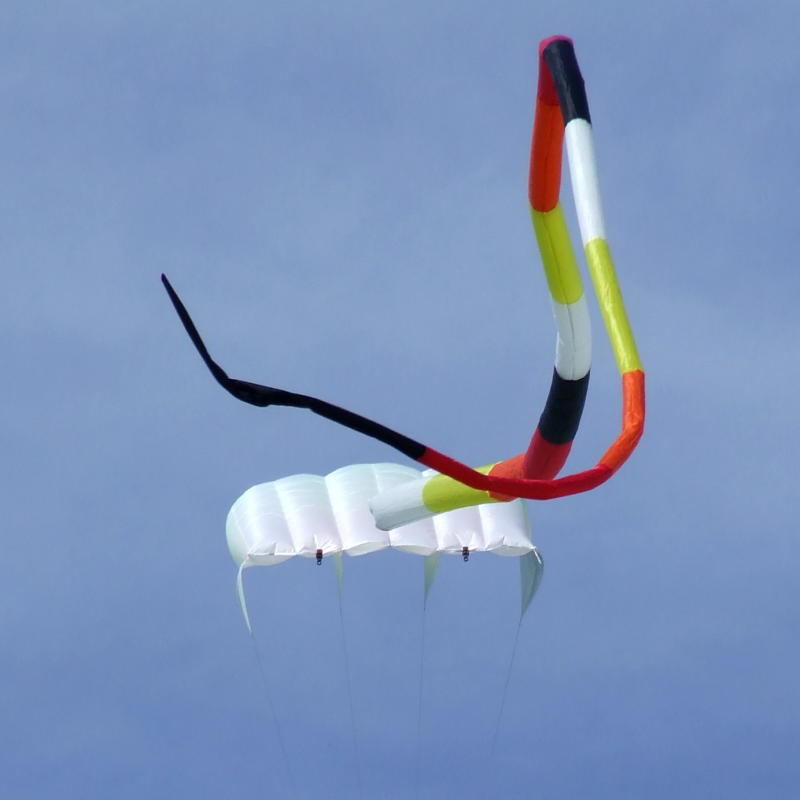 Another early flight photo with a single tube tail borrowed from the FF04A. (same image in: medium size)
August 28, 2010: I finally finished the almost-matching tube tails today, and the weather was decent for flying. Too bad I missed having them ready for the Dieppe (Canada) 2010 Kite Festival.
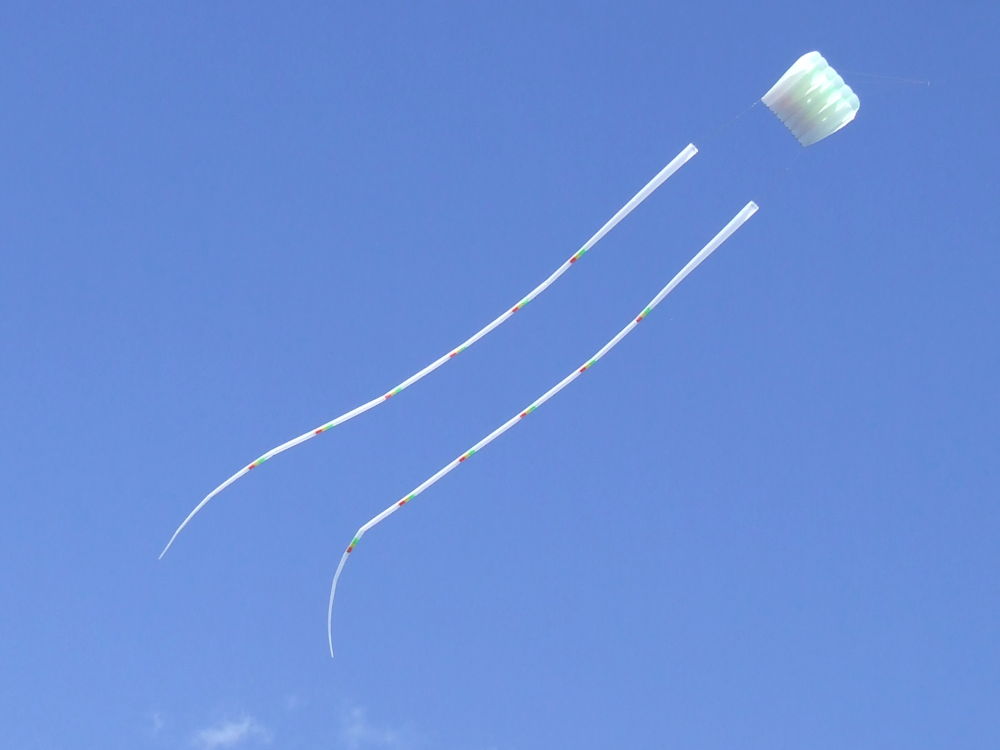 I tried to think up a practical way to have short concentric cylinders of coloured fabric that did not touch the main body of the tail, to obtain the diffuse colour effect, but I could not decide how to do it. Instead, I simply layered the colour panels directly onto inside ofthe main body, so the colour comes out more saturated on the shaded side. The directly-lit side is more pastel, but the ends of the coloured segments still have hard-edged borders. (same image, medium size.)
These tails are nominally 45 feet (13.7 m) long. The 10-foot-long leading end "scoop" sections start out at 8 inches (20.3 cm) diameter and taper down to 4 inches. Then there are five 5-foot-long segments that are 4 inches diameter, with no taper. Finally, a 10-foot-long section (beginning with the final coloured segment) that tapers from 4 inches down to 1 inch. The bridles on each tail are three 2-meter pieces of 50# braided dacron line, doubled over for six legs of 1 meter each. (I just picked that length out of a hat) I did not use any knot at the front on where the bridle lines are doubled, but simply passed them through a short loop of line, so that they can balance themselves out. I could have used just four bridle legs, but I think that using six gives me a smoother, rounder, leading end opening.
I also discovered a "bandaid fix" for the kite usually leaning to the right, typically about 30-40°, depending on the wind speed. Changing the bridle lengths, adding or moving tsils around, and opening symettrical pairs of trailing end cell openings didn't help much. What did help was closing off cells #1, 2, and 6 using the Velcro flaps. I would have thought that mis-matched openings would make it worse. Go figure. Now the mystery is still what's causing the unbalance in the first place? I'll have to try some more bridle adjustments, but take notes the next time.
Trailing Edge Details
Here's what worked out for the trailing edge openings, so that I could non-permanently close up the middle of any of them.
1 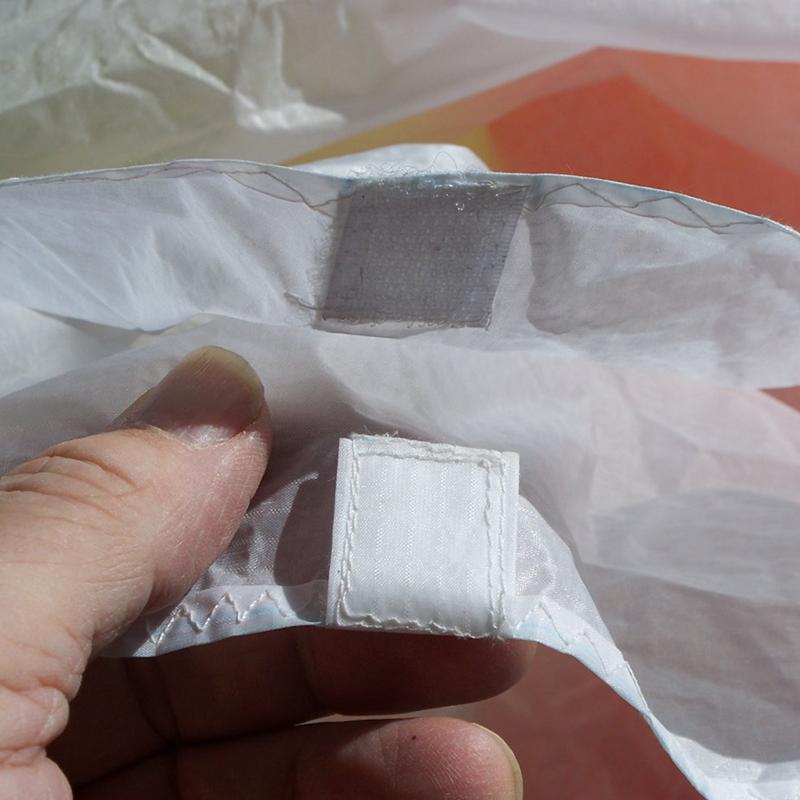 2
2 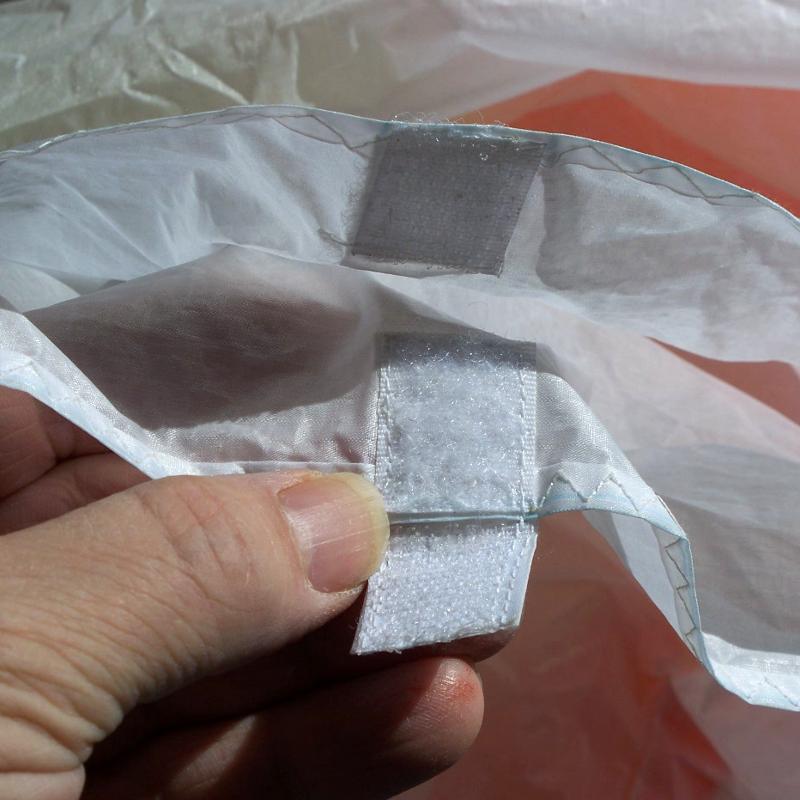 3
3 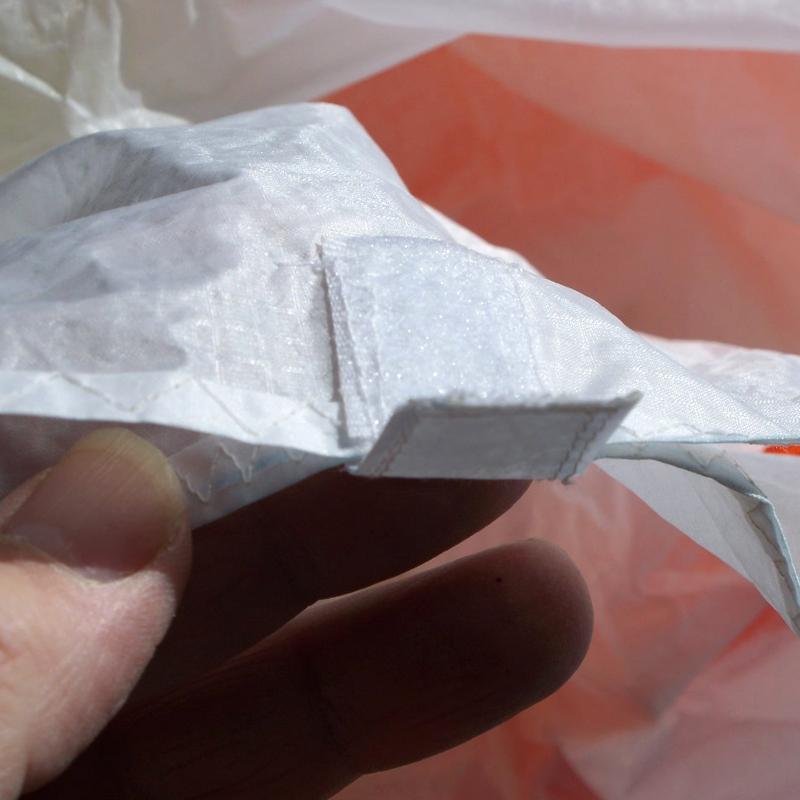 4
4 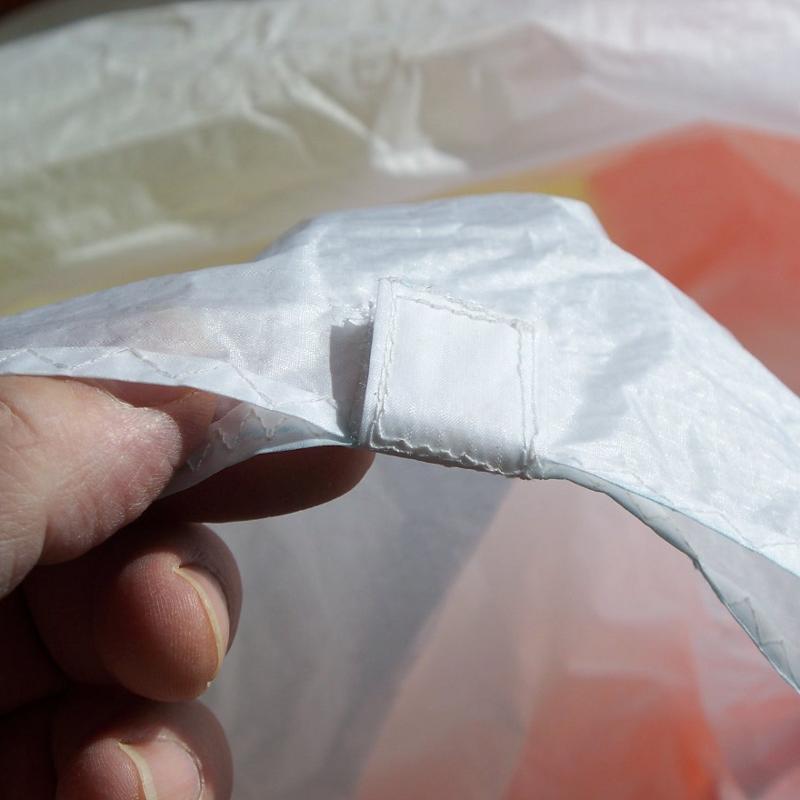
Photo #1 shows a trailing edge section that is fully open. The ripstop nylon tab has a piece of the hook side of the Velcro sewn to it. The tab is folded over and attached to a piece of fuzzy Velcro on the inside of the bottom skin. This just keeps the tab out of the way when not in use. Note also that there is a piece of hook Velcro on the inside of the upper skin. More on that later. (medium size photo)
Photo #2 shows the tab open, exposing the fuzzy Velcro on the inside of the lower skin. (medium size photo)
In photo #3 I've pressed the top skin's inside hook Velcro to the bottom skin's inside fuzzy Velcro. This closes the middle of the opening, but is not yet secure because it is fairly easy to peel Velcro apart. (medium size photo)
Finally, in #4, the tab (with hook Velcro) is wrapped up and over both edges, and pressed to the fuzzy Velcro on the outside of the upper skin to secure the connection. This takes advantage of the fact that it is much more difficult to shear the velcro bond. (medium size photo)
This is why it's nice to buy up Velcro in as many different colours as you can find, when you find it. The more common black Velcro would have been too jarring to use on this kite.
 When I sewed the profiles in I included a loop of masons' line at each profile. It's braided nylon, 165 pound test, and soft enough to sew through. The line extends inside for a few inches in the seam. This leaves me a lot of choices for the number of tails I might want to use – 1, 2, 3, 4, or 7 – and still have them evenly distributed across the trailing edge.
 More often, it's the tails that have a loop (my tails do, anyway), so I have a couple of spare "pigtails" that have a stopper knot on the end, and I can larkshead the tail's line to it.