northernelectric.ca main index < kites <
Borelli Glider Kite
I wanted to build a low wind/no wind kite, for those days when there is no wind. After looking at a number of designs, I settled on a Borelli Glider. It has many features in common with several fighter kites designs but is optimized for for soaring and gliding, or even indoor flying. Best of all, these can be made very cheaply, using common materials such as a plastic bag, matchstick bamboo from a window blind, a large (approx. 1" long) aluminum pop rivet, some tape and/or contact cement. Most indoor kites require relatively exotic materials such as thin carbon fiber rods or tubes for the frame, and ultra-light skins like Orcon or Icarex.
Find the plans here, in Spanish: http://www.batoco.org/planos/2008/04/planobarriletegliderborreli.html
Or as a PDF, also in Spanish: http://www.batoco.org/planos/files/BorelliGlider.pdf ( 728 kB )
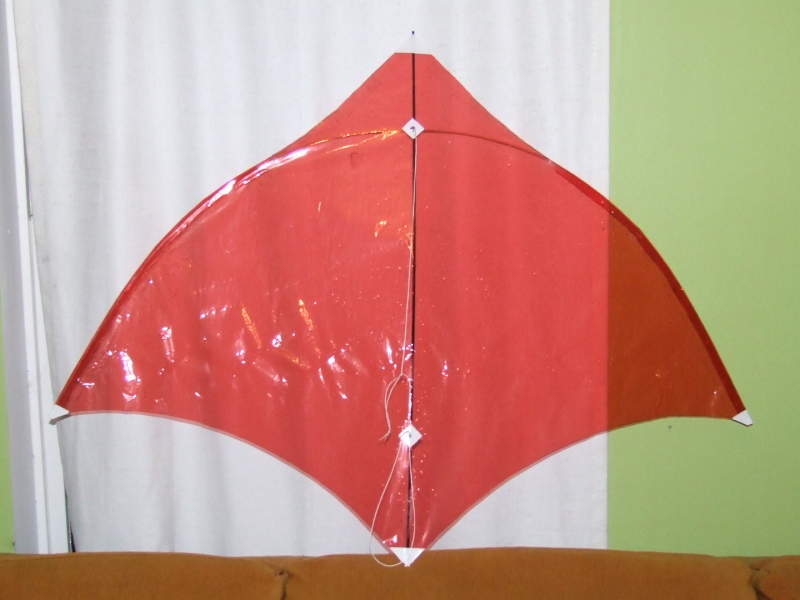
I chose to substitute some red transparent cellophane that is used to wrap gift baskets and such. I bought a 32" wide roll of it at a "dollar store" for $3.00, and it had several meters (10m? not sure, lots, anyway) on it. I also decided to use a 1/8" diameter wood dowel for the spine, because the bamboo seemed a bit too flimsy. It may be that Nelson Borelli had some slightly thicker bamboo when he made his.
(click on thumbnails to see larger photos)
 |
The half-plan, drawn on folded paper. As usual, a simple plan can have complications. The first one was figuring out how to draw a nice smooth curve for the trailing edge of the wings with only two hands. You need two hands to bend something like a meter stick or a fiberglass rod to fit the shape, and a third to operate the pencil. See Flat spline in wikipedia for the general idea. I came up with a scheme that involved a 1/8" (3.2 mm) diameter fiberglass rod. The far end has a few wraps of white duct tape close to the tip. I tied some twine to that far end, and the tape prevents it from slipping along the rod. I cut a short length of clear vinyl tubing (about 2" or so?) with an inside diameter of 1/8" and slid it over the other end. The other end of the twine was tied next to the tubing, so that it bowed the rod. The tubing is just loose enough that you can slide it along the rod while the twine is under tension, and adjust the curve of the rod, yet it does not slip by itself. The green tape is a low-tack tape that painters use, and was there to keep the rod in place once I got the curve right. |
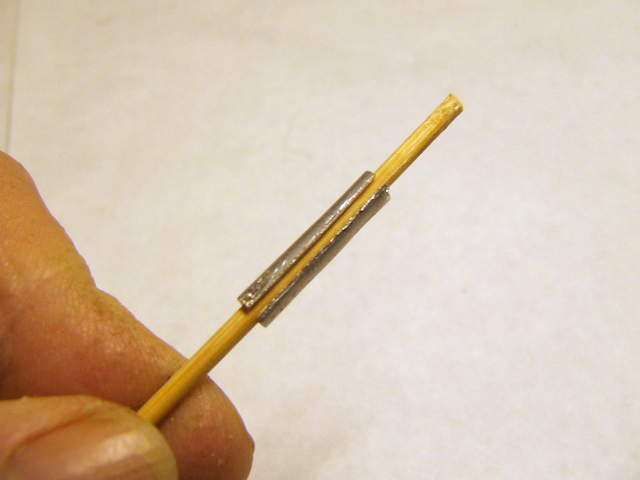 |
The next problem was with the pop rivet for the centre spar ferrule. See the original info here. Once I got the "nail" part out and the flat end cut off of the pop rivet, I found that the inside diameter was too big for a snug fit with the bamboo I was going to use. This is why I suspect that Nelson Borelli had slightly thicker bamboo. I considered using tape on the bamboo to make it bigger, but it was too easy to tear the tape when inserting it. I hit on the idea of sawing a slot along one side with a hacksaw. That removed just enough aluminum so that when I squeezed it shut in a vise, the bamboo fit perfectly. |
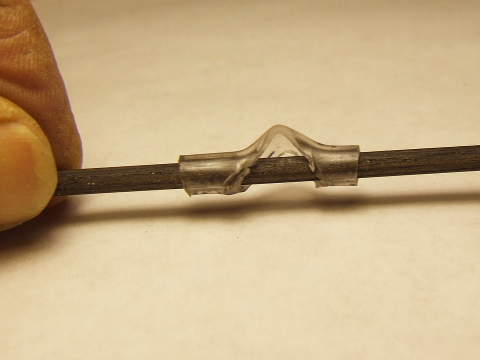 |
Again, with the pop rivet ferrule. The plans called for drilling a hole through it, to tie it to the spine with the bridle line. Rather than do that I cut a 1" length of 1/8" (inside diameter) vinyl tubing and trimmed away half an inch from one side. Put it on the spine, slide the ends toward each other a bit, and... |
 |
... you have room for the aluminum ferrule. There is also room under the arch for tying the front leg of the bridle to the spine. It also means that you can (with some effort) slide the ferrule off to one side and separate the spars so you can fold the kite for storage. |
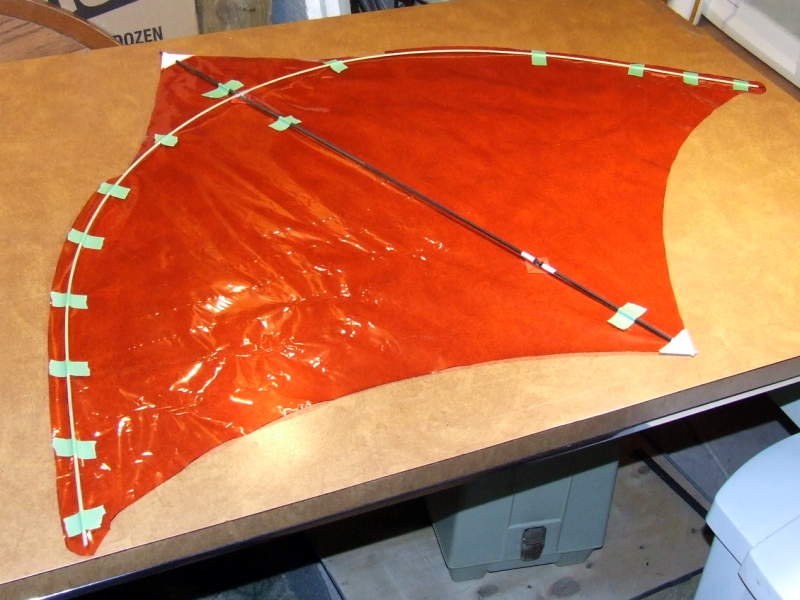 |
The plastic skin is taped to the spine at the nose and tail with some white duct tape. the green tape is just there to hold things together while I tape up the wings. Oh yeah. the plans call for using contact cement to glue the skin to the frame. I didn't like that idea because it would mean that if even just one of the wing spar cracked or broke, then you would pretty well have to write off the whole kite. I decided to used Scotch tape to hem the wings, forming tunnels for the spars. The wing tips also got some white duct tape so that the spar tips would not poke through the ends. I used a four-holed button for the spine's bow line. |
 |
January 4, 2009 - Done. We've been having miserable weather all week. Mostly snow, rain, high winds, or all. As soon as I finished it, I had to try it out, so there I was out in the back yard, lit only by nearby street lights, with wet flurries and slightly turbulent wind blowing at about 6-8 km/h. By golly, it flew, and only hit the ground (snow, actually) once as I was hauling it back down, in spite of the awful conditions. The wings folded back quite a bit since it was in much stronger wind than intended for it, but it survived. The flying line was some thin twisted nylon, much heavier than it should be since the recommend line is heavy sewing thread. I can't wait to try it out in decent weather. |
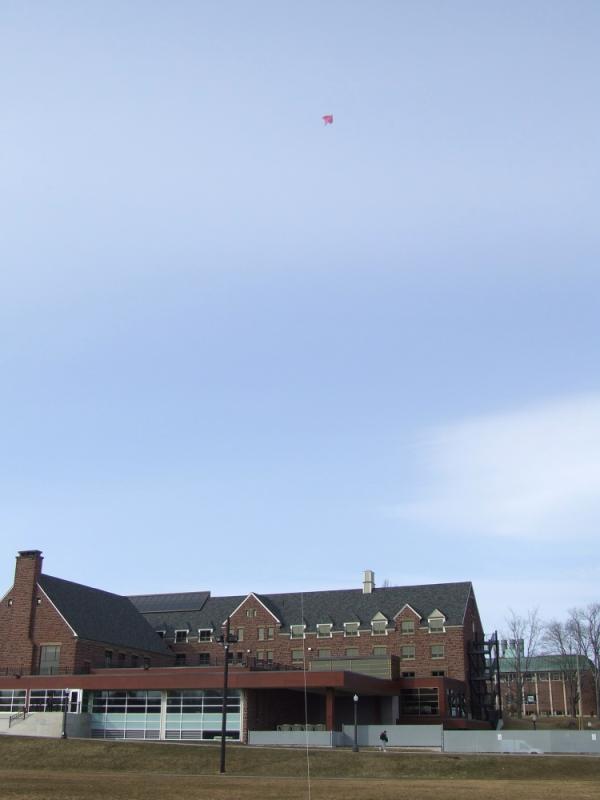 |
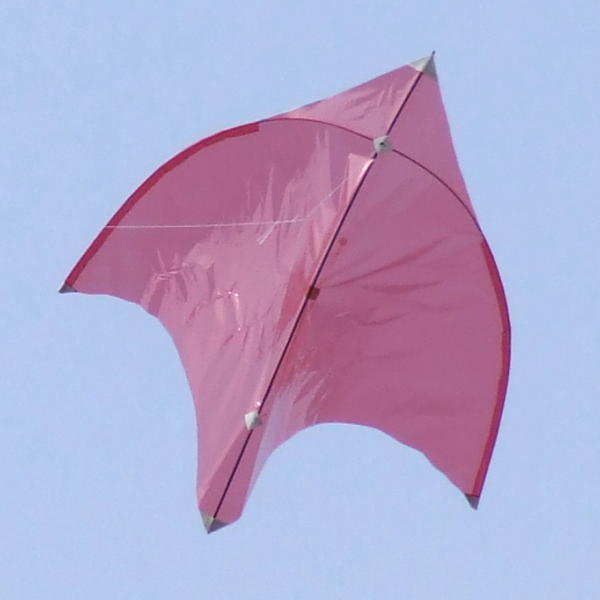
And here we are, and the Mount Allison University football field. It's that little red dot in the sky. The wind was around 4-7 km/h, which was plenty to fly it as a regular low-wind kite, and too much to use it as a glider kite. I flew it on some thin twisted nylon line on a stake reel. It kept turning to the right until I stuck a bit of green masking tape in the middle of the spine, keeping the spine lined up about 2 cm to the right of the center line. |
|
A closeup shot. (same as above) |